Server

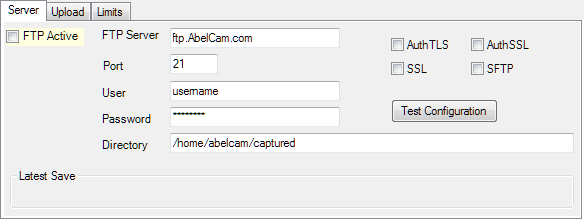
FTP Active: check this to activate FTP Upload
FTP Server: enter the name or IP number of the FTP Server
Port: enter the port of the FTP Server (default is port 21)
User/Password: enter the login information
Directory: enter the target directory for the FTP Upload
Date/Time substitutions are supported if you want to create a directory structure, eg #yyyy/#MM/#dd
AuthTLS / AuthSSL / SSL / SFTP: check one of these if your ftp server requires an encrypted transmission
Test Configuration: click this button to test your configuration
if you don't see an error message, the upload worked. A test image will be created on your ftp server.
Latest Save shows the last file uploaded

Upload
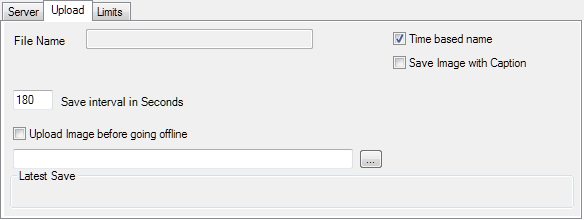
File Name: enter the file name to be uploaded, eg. snapshot.jpg
Date/Time substitutions may be used in the file name if you want a time based name but a different file name than the one below.
Time based name: check this to upload the images with a time generated name (YYYYMMDDhhmmss.jpg).
Save Image with Caption: check this to include caption and overlay image on the image to be uploaded
Save Interval in Seconds: enter the interval in seconds
Upload Image before going offline: check this if you want a image to be uploaded before this camera goes offline. Enter the file name in the textbox or select one (...)
Limits

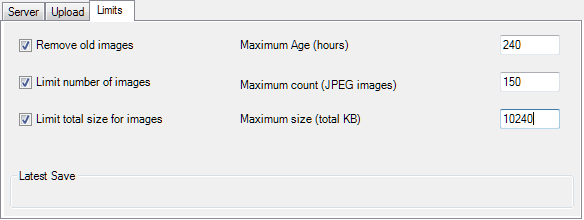
Remove old images: to remove old images from your ftp server, check this. Set the maximum age in hours.
Limit number of images: check this if you want to limit the number of files on your ftp server. Enter the maximum number of images. All jpg images in the upload folder will be removed until the number of images is <= the maximum number, oldest first.
Limit total size for images: check this to limit the size used by uploaded images. Enter a maximum allowed total size in KiloBytes.
See also: Motion Detection